Monday, September 23, 2019

Bike Bags 2 - Review of Ruster AHH

I decided I wanted a different case after twice using the Pica Packworks EEP to transport my 48 cm Cervelo P2C with 650 cc wheels.  You can read my case review and experiences with it and a hard-sided case here: Bike Bags 1 - Overview and Pica EEP review.  Admittedly, I'd purchased the EEP on the recommendation of a friend, without doing my own homework.  I wanted to do better for its replacement.

Top left - Sub 62.  Top right - EEP.  
Bottom - Armored Hen House wheel & frame bags.
Two things stood out about the Ruster Armored Hen House.  First the high density polyethylene "armoring" sounded more protective than a purely soft-sided case.  Secondly, the bag was advertised as being,
"the only bicycle travel case to meet the airlines standard of 62 linear inches to avoid excess and oversize baggage fees, which means you can save thousands of dollars simply by traveling with your bicycle in the Hen House" (ref).

Here's the truth, though.  If one measures only the length of the case that touches the ground (~30” if you omit the wheels), and the height (24”) and width (8”), one might conclude this was not an oversized bag (>62 linear inches).  While I’m happy to take advantage of that math, it’s disingenuous at best.  Contrast: Orucase Sub 62, to be covered in a future review.
Frame bag plus wheel bag

Ruster Armored Hen House (AHH)
This 700 cc wheel shows the bag is a bit shorter
Ruster measures bag length from pivot point
(obscured by bike wheel) to edge of bag.
Price then: >$500
Price now: $579

Pluses: Each bag is smaller and easier to handle, wheels on frame bag facilitate dragging it, wheel bag is not oversized, frame bag might slip through as not oversized, both are lined with high density polyethylene which adds some puncture resistance

Minuses: Frame shifts inside bag, chainring pokes bag, extra bike disassembly required

Packing specifics: More cumbersome than other bags I've used: 
  • Take pedals off 
  • Remove seat post
  • Remove wheels
  • Remove front brake, or cable from front brake
  • Remove handlebars / stem from steer tube
  • Remove fork, taking care to not lose or disorder the stem spacers, headset bearings / washers / etc
  • Lay frame flat on a sheet
  • Remove derailleur, place in provided pouch
  • Apply drop out and fork cross bracing (both supplied with the bags)
  • Wrap frame in pipe insulation (some supplied, additional purchased separately) 
  • Use supplied velcro straps to secure the handlebars, fork, seat post, and pipe insulation to the frame, and secure the derailleur bag
  • Open up the bags' peripheral padding and insert padded / bound frame & handlebars into case (top tube toward the bottom)
  • Tuck the peripheral padding in, fasten velcro, and zip the case closed 
  • Fasten straps and cinch down
  • Slide wheels into wheel bag & fasten pouch straps
  • Place wheel skewers into pocket, pedals might fit here too
  • Zip wheel bag closed, fasten straps and cinch down
  • = Everything in two cases
Cardboard spoke cover, this
one for the cassette side
of the rear wheel.
Random info: After having my 650cc Zipp 404 spoke broken in the Pica EEP on my trip home from Calgary I decided to fashion some wheel covers out of cardboard.  I'm sure I don't really need to use them with the AHH given the armoring supplied by the high density polyethylene inserts.  But I do so anyway.  And Ruster recomends it with disc wheels.

My experience(s): I've used the Hen House 3 times.
2016 - domestic on Southwest (PHL to SFO) with my Cannondale Slice (48 cm).  I had my helmet in with the bike, and shoes, bottles, tools, wetsuit in with the wheels.  No charge (2 bags fly free), though I worried about it asairlines seemed to be cracking down on this at the time and the frame bag is factually in excess of 62 inches.  These cases arrived with regular sized luggage in baggage claim and fit easily into cars.  I traveled with my clothes in a back pack, which I carried onto the plane with me.  I carried the wheel bag with the supplied shoulder strap (worn diagonally across my chest) and I pulled / rolled the frame case behind me.  Bulky, but easier for me to manage than the Pica EEP.

A rear skewer and fork brace come
with the AHH, but my painter threw the
fork brace out so I've made a substitute 
from a piece of quarter round (gets held
in place with painters tape.)
A padded derailleur bag and several
velcro straps come with the AHH, as
well as two segments of pipe insulation.
(I use a minimum of 9 pieces though.)
I've added foam padding over the
hubs to help protect the wheel bag. 
Large plastic bags keep it all tidy.

The wheel bag has a padded divider that's 
velcro'd to the case bottom, a zipping
pouch for skewers, as well as
extra space that accommodates items 
like shoes, water bottles, etc.
This case has flown twice.  Even with the AHH's 
protective HDPE sheets, the wheel hubs still lead
to bag wear (seen above the business card).
This is why I've added the foam
padding to the cardboard.
The peripheral padding is attached only at the  
bottom of the case, and doesn't stay in place  
around my frame very well.
2018 - domestic on Southwest (PHL to Ontario via Las Vegas).  I was asked in Philly if it was a bike.  I replied it was exercise equipment for my hip as I'd had surgery, which was a handy version of the truth as my hip was bothering me at the time.  No charge, but I am not comfortable with the experience of carefully explaining myself while verbally tip toeing around the B word.

The much thinner padding in the AHH (red) 
contains a layer of high density poly ethylene, 
which would provide nice protection if 
weren't flexible enough to slip out of 
position.  I find the thicker padding of the 
EEP (grey) stays in place better.
2019 - domestic BikeFlights transport via FedEx (outbound) and UPS (inbound).  This was the wrapped frame and fork only, sent off for re-painting.  No issues, but it's clear the bag is very much larger than it needs to be to transport my small bike.   

Final opinion: I'm unhappy my frame shifts within the bag, and that the peripheral padded HDPE strip doesn't stay put over my chainring.  Unless one or the other situation is avoided, I'm afraid the bag is going to get torn or worse, my skinny chain and seat stays get damaged.  Additionally, as I ride a tiny bike and this was before some airlines began revamping their bike policies, I was interested in finding a case that would legitimately fall within the dimensions for standard baggage. Bonus points if it could be carried like a backpack.
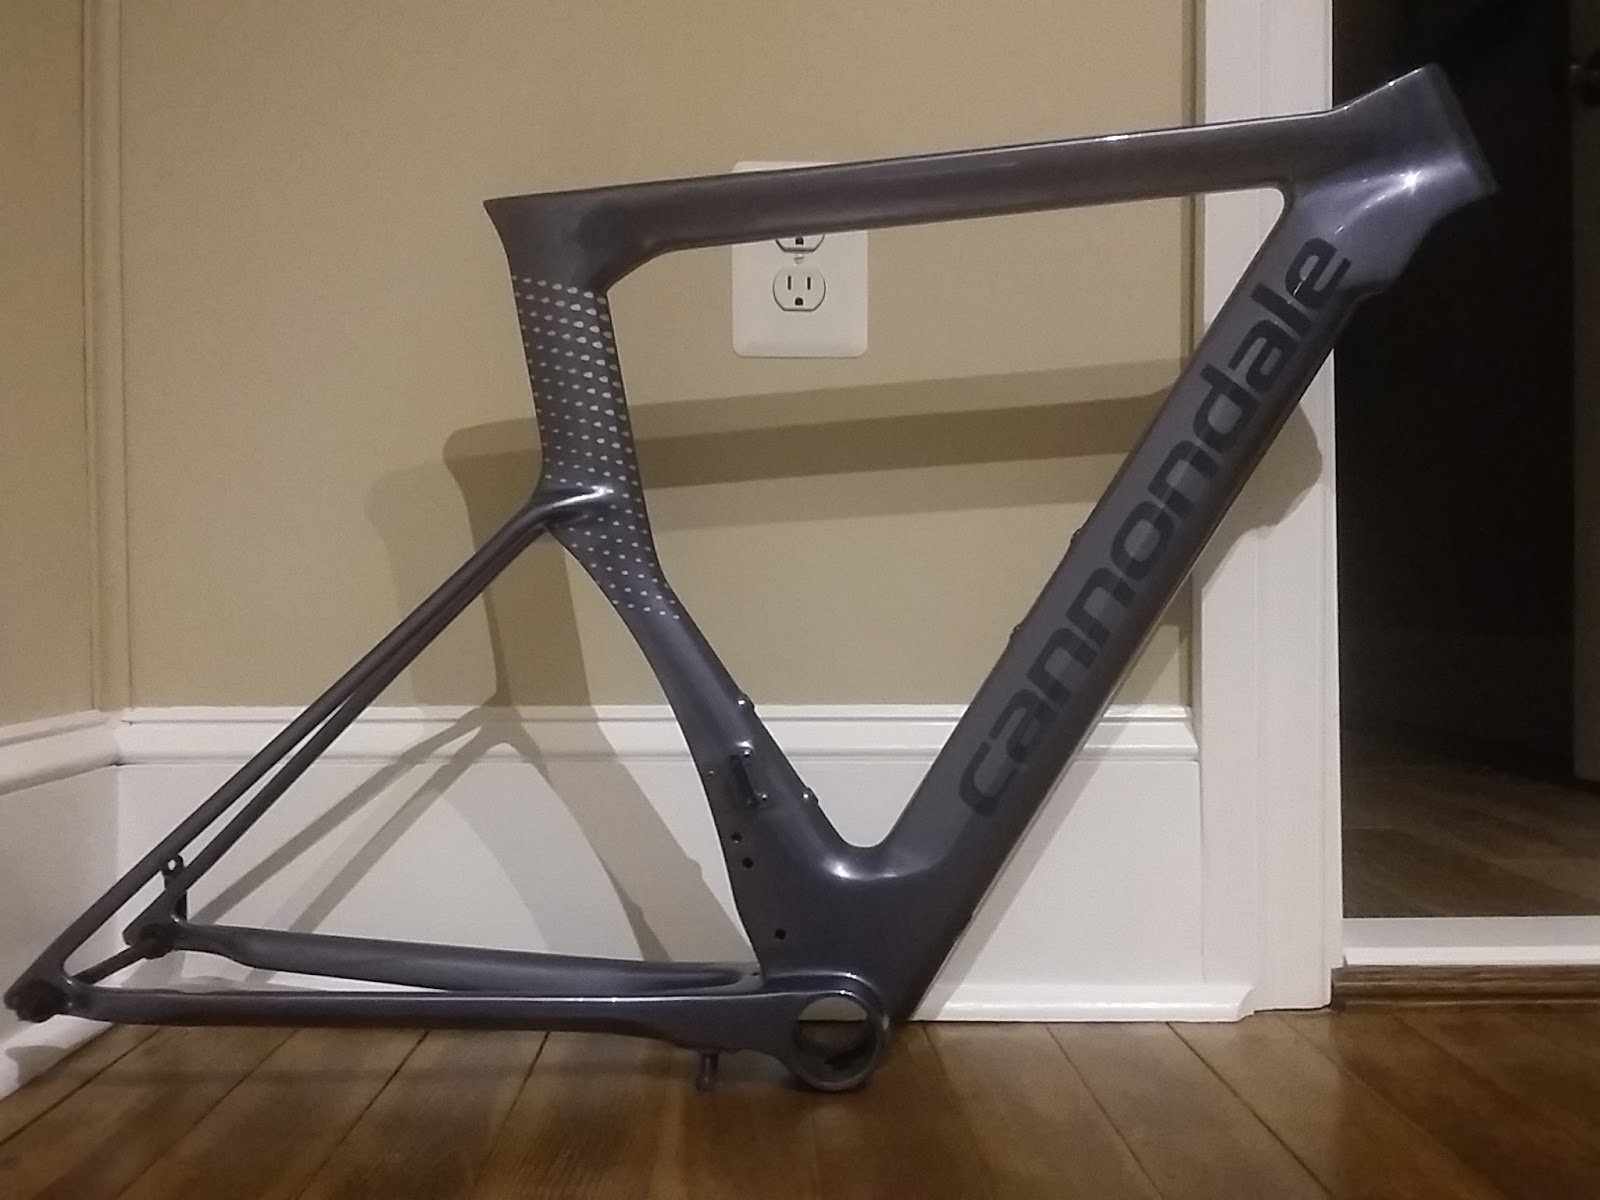
Unlike with the EEP, the frame goes top tube down and crank up in the AHH.
Overall, this is another case that is quite a bit larger than my frame.

Sunday, September 22, 2019

Bike Bags 1 - Overview and Pica EEP Review

Over the years I've had a bike in 4 different versions of luggage, and I have some opinions on each of them.   This summer I thought I'd write a post on that but before I could get to it Dan of Slowtwitch acted on the same idea.  His reviews seem prompted by recent changes in baggage policies for some airlines.  Mine are based on a desire to find the best fit for my frame.  You'll probably find his reviews more authoritative, but mine will be more specific to my experience as a 5'3" cyclist traveling with small bicycles.  If you're also a smaller cyclist traveling with small frames, maybe what I write will be useful to you.  Maybe.

I'm going to divide this into 2 or more posts in an attempt to avoid writing a novel.
The cases I can write about are:
 
Back left - Sub 62.  Back right - EEP.  
Front - Armored Hen House wheel & frame bags.


Generic rectangular hard-sided case

Price then: Est $500, based on memory
Price now: Varies widely

Pluses: Good protection, low effort for bike disassembly

Minuses: Bulk, weight, cumbersome

Packing specifics: The easiest of those I've used: 
  • Take pedals off 
  • Remove handlebars from stem, or stem from steer tube
  • Loosen seat post, or remove if needed
  • Remove wheels
  • Lay frame into case, lay handlebars flat
  • Cover with layer of foam
  • Lay wheels on foam
  • Close case, latches, fasten straps
  • = Everything is in one case
My experience(s): I used this case in 2001 to fly from Austin to Denver with my road bike (Giant TCR1, size small).  I was able to borrow the case from a cycling buddy, which was good as it cost more than my airline ticket.  Case leaves lots of room to include cycling shoes, helmet, tools, but damn, was it heavy.  I don't recall whether the case I used had wheels (maybe 2?), but I was lucky to have one friend drop me off at the airport and carry the case in for me, and another pick me up from the airport at the gate.  The Austin friend borrowed his roommates SUV, and my Colorado friend had a hatchback with seats that folded down.  I paid for the privilege to get this on the plane, $75 each way?  Don't remember for sure now.

I pride myself on being self-sufficient when I travel, and pack so I can carry my own bags.  Meaning I wouldn't want to use this case again.  To lay it flat on an airport cart would make it really wide, but it would not have stood up on a moving cart without being held there.  I'm sure I could have gotten it into the automobiles that were used by myself - it was heavy but not impossibly so - but it would be an all-body experience and I surely would have scratched the bumpers in the process.  Storage of the case during my vacation wasn't an issue since my friends apartment had plenty of room, but in a small hotel, or in my apartment / house if I owned it, would have been annoying.


Pica Packworks EEP (soft-sided case)
Pica Packworks EEP
Strip of padding around the case perimeter is ~2" thick
(Picture from https://www.nytimes.com/2008/06/12/fashion/12physical.html)
With almost no markings, the bag is fairly unassuming.  
The size, however, may not fool airline staff who
seem to recognize, Probably Contains Bike.

Price then: ~$335 as per this 2008 NYT article.
Price now: $406

Pluses: Light, reasonably easy to carry & to store, packing is fairly simple, has some chance of getting through airport check in without being recognized as a bicycle

Minuses: No way to fix / secure the bike frame to the case, no zipping pockets for small parts
There are handles on the top of the 
bag and also on each side, where 
reinforcement protects the bag 
from the wheel hubs.  The D-rings 
(two on each side) accept a shoulder 
strap if you supply one.

Packing specifics: 2nd easiest of those I've used: 
  • Take pedals off 
  • Remove handlebars from stem, or stem from steer tube
  • Loosen seat post, or remove if needed
  • Remove wheels, and skewers from wheels
  • Remove derailleur, place in provided pouch
  • Supply and apply drop out and fork cross bracing
  • Use the single supplied pad to wrap either the top tube or down tube, and wrap the remainder of the frame in pipe insulation (purchased separately) 
  • Use velcro or zip ties to secure the handlebars to the frame, secure derailleur bag
  • Open up the bags' peripheral padding and insert padded / bound frame & handlebars into case
  • Slide wheels into side pockets & fasten pouch straps
  • Slide seat post into side pocket
  • Place wheel skewers, pedals, other small parts into a ziplock or something and tuck into bag
  • Tuck the peripheral padding in and zip the case closed
  • Fasten straps and cinch down
  • = Everything can be in one case

The wheel pockets have reinforcement
for contact with the hubs.
Foam blocks provide cushions for the bottom
bracket and rear dropouts.  The chainring 
sits in the groove, keeping it from sliding.
The pictured buckled strap secures the 
peripheral foam to bag, but isn't long enough 
to secure the bike as well.


A padded wrap for the top tube or
down tube is supplied, along with a
pouch for the derailleur.
My experience(s): I used this case 3 times.
2014 - domestic flight on Southwest (PHL to Denver).  In line at curbside check in for my departing flight, one of the baggage handlers asked if this was a bike.  I replied, Who would transport a bike in a soft sided case?  He asked where I was going, went away and came back with my bag tag, and I handed him a $20.  I don't think he was fooled.  On the return flight I checked in at the counter and the agent didn't even ask - just took the bag and weighed it like it was any other.  And this is why I prefer Southwest Airlines, especially when traveling with sporting equipment.

The bag and contents - 48 cm Cervelo P2C, cycling shoes, helmet, water bottles and wetsuit (which was draped over the frame in the event I had to open the bag for inspection) - were light enough to carry with a shoulder strap while I dragged my roller suitcase behind me.  But as a shorter person this wasn't exactly easy.  Still, I managed the shuttle service to the rental car area, and was able to slide the case into the trunk (rear seats folded down) of the economy sedan without issue.

48 cm Slice pictured on top of Standard sized EEP gives an idea
of the extra space available for including additional gear.  
(Disclaimer - I've never used this case to transport this bike.)
Note: It's best to use protective drop out & fork bracing (not shown),
and to remove the derailleur since the soft-sided case provides
no protection against crushing.
2015 - international flight on United (PHL to Vancouver).  They didn't care it was a bike, they cared the case was oversized and the manager came out with a tape measure to confirm that.  $200 plus $35 for it being my 2nd bag.  Boo.  My return flight, on Air Canada, started as domestic (Calgary to Montreal) and this is actually where the troubles came.  Because the x-ray machine at their domestic terminal was too small to take the packed case, I had to unpack it and send the contents through individually.  This was a pain in the ass, and they were not at all happy to have the derailleur hidden in a pouch so made me pull that out - greasy, and dangling by the chain and shift cable.  On initial packing I'd taken lots of care to stowe things securely but now, I was just trying to comply with their wishes as quickly as possible.  Turns out things may have shifted during baggage handling, and I ended up with a scratched helmet, frame, and a broken spoke.  While it's nice Air Canada only charges $50 (CAN) for a bike, I can't say the entire experience was a win.
Cardboard spoke protection, w/ 
foam padding over the hubs.
Large plastic bags keep it all tidy.

2019 - domestic BikeFlights transport via UPS.  This time I was transporting my carbon road bike, a 50 cm Trek Domane with 700 cc wheels.  Three things made this a difficult fit in this case.  1) Unlike the Cervelo, the seat post of my Trek is integrated with the frame, and therefore protrudes upward from the top tube.  2) The cables were a bit short, making it really difficult to rotate the handlebars around enough.  3) This time around I included cardboard on each side of both wheels, to protect the spokes.  UPS transported my bike without damaging it, but I'll note they did not honor the requirement for obtaining a signature on parcel delivery in either direction, handing the bike to my Dad on its southbound leg, and simply dropping the bag off on my exposed-from-the-street front porch for its northbound journey (double gasp).

I've recently learned FedEx damaged the bag of another user, reportedly putting "a giant piece of metal through" their case, amazingly not damaging the bike but leading to the loss of some small parts that were contained in a plastic bag.  And this folks, is the clear down side to this soft-sided case, the sides of which are not reinforced with any hard plastic.

Final opinion: I think this case would have worked well-enough for my earlier aluminum road bike, but I'm uncomfortable with the lack of protection against piercing - particularly for carbon bikes.  I also don't like that there's no way to secure the frame to the bag, or any zipping pockets for smaller items like pedals & tools (which I recommend packing inside of bubble wrap and fastening to the frame to prevent shifting).  Additionally, I wouldn't want to continue risking paying an oversized bag fee, though lately some airlines have relaxed these.

Saturday, June 22, 2019

Adventures in Bike Modification

Step 1: Paint Scheme
 
I like the subdued tone-on-tone schemes found on a number of TT bikes these days, where the branding logos are less prominent, but wanted something more interesting than the over done combo of black on black.  The design was inspired by options available for Trek Project One builds, but I changed:
  • The Cannondale logo has been better centered between the chainring and head tube (in the finished build).
  • The dot pattern was constructed in ChemDraw using a P orbital lobe rotated, copied, pasted many times, resized, aligned in rows and columns that were painstakingly shifted to achieve angles that would compliment the seat tube.
  • Font, scale, and positioning of my nickname for a location Trek models don't have.
Step 2: Break down of stock build (Slice 1.0)

I didn't know how to get the plastic part off the top tube, through which the derailleur and rear brake cables ran.  I should have looked it up but I found it twisted off, which left a screw bolted through the top tube.  My shop broke down the crank and bottom bracket, but didn't know how to remove the bolted screw and didn't want to try.  I suspected one part screwed into the other but spent no time looking into it, packing the frame up for shipment to the painter as quickly as possible.

Step 3: Paint Job
 
I wanted to use a local painter but the timing didn't end up working out, so I sent the frame to Jack Kane in NC.  I relayed my shop's recommendation that he may need to check with Cannondale on how to remove the screw.  Unfortunately he interpreted that the screw insert had pulled out of the frame, and he "fixed it".  Meaning I now have a threaded insert in my frame in a place I'm not supposed to and no longer have the screw that is supposed to be screwed into the plastic cap.

My earlier experience having a bike custom painted involved powder coating an aluminum frame; the result was a really solid finish that was robust to routine handling.  My Slice came back looking pretty slick.  The templating for the orbital dot pattern came out close to how I intended, and the color match between frame color and branding logo color was reasonably similar to what I was looking for.  Unfortunately painted carbon is less robust and I didn't even get my assembled bike from the shop without chips and scuffs to the paint.  I knew I wasn't paying for the showroom quality paint job, but I did not understand that to mean it would be so easily nicked.  :-/
The painter thought my design scheme was weird,
but I'm quite happy with it.


Step 4: Take Frame and Box of Parts to My Mechanic

Initially I intended to build the bike myself but in the interest of time, and knowing that I'd have to get help with installation of the bottom bracket assembly, I handed everything over to my favorite LBS.  This is my first custom build (of a carbon frame) and I don't know if my experience is common or not - I certainly mean no disrespect to my mechanic - but the process was really much more involved than I expected. 
  1. I described the issue with the top tube wire cover / threaded insert and shared that I thought we'd need to reuse the OEM cone headset cover as per the owners manuals.  He noted the extensions were really long and was going to cut 2 cm off.
  2. He got back to me when he started the build, saying the TriRig brake wasn't going to work on the back.  I knew he was basing this on his experience rebuilding a prior model Slice, and that he was incorrect.  The rear brake on my 2015 model is mounted on the bottom bracket and Trig's center pull brake was going to work just fine.
  3. The next update was that the 5-port junction box wouldn't fit into the stem cavity recess and he wasn't sure where to mount it.  The usual location (under the stem) wouldn't work with the 2 TriRig spacers he used in place of the OEM headset cover.  I thought we had to use the cone but he said he didn't think it fit right and the trailing wire cap wasn't going to fit at all with the TR spacers.  TriRig's website clearly shows the 5-port junction is meant to fit in that cavity, but I know some ST forum members had filed the junction because it was a tight fit will all the cables in there.  He said the rear brake line had to be externally routed or the cover wouldn't close.  My response: no way, the whole point of these bars is that all the wires and cables are hidden, so I sent him some photos and notes of builds from the ST thread.
  4. The build was ready for fitting and I went to make the adjustments so the next cuts could be made.  Trouble was, the extensions were so long I couldn't come close to reaching the shifters; at least 8 cm had to come off before I could try again.  The rear brake line had a barrel adjuster on it, which I could see might prevent closure of the stem cover.  The front brake line cable housing terminated in the stem and was run as bare wire to the brake.
  5. I picked the bike up the following day to dial in the fit at home.  The steer tube had been cut to length, a new rear brake line without barrel adjuster was installed routed through the handlebars, and the gnarly filed A junction (which still wouldn't fit inside) was velcro'd to the top of the stem cover until another solution could be found.  Jude walked me through how things worked: the Di2 charging, programming, disassembly to pack the bike for flying, easy adjustment of the brakes with an allen wrench (cable adjuster wasn't necessary).  I noted a chip in the down tube paint and that the handle bars were super floppy, no longer staying straight at all on their own.
  6. I adjusted the fit the best I could but the extensions were still way too long.  I cut 2 cm more off the back ends and dropped the bike back at the shop, asking if it was possible to cut the front ends shorter given where the bends are.
  7. He cut the front of the extensions as much as possible and angled them and the shifters how I wanted (buttons down and rotated inward, to use with my middle fingers).  Then we checked the new overall length and cut the back of the extensions again, the bar tape was wrapped, and I was off, noting again how floppy the handle bars were as they twisted around and the brake hit the head tube.  Shit, now I could see the paint was chipping around the head tube from the impacts with the brake.
 Slice 2.0, Shop rebuild.  TriRig stem spacers, bare wire to
the front brake, Di2 junction box velcro'd to the stem cover.

Step 5: Fix All of the Things

The primary issues to solve were getting the Di2 junction installed as intended, reducing the floppiness of the handlebars and preventing worsening frame damage from the impact by the brakes.  This took me weeks to sort out.  Ideally I could summarize this in a less annoying fashion than it all took place.  Alas...

1. Floppiness.  Suggestions from the Alpha One thread on ST included tightening the headset preload, using the headset shim supplied with the handlebars, and that maybe the missing stiffness was due to removal of the 2 wired derailleur cables and the plastic cap that used to cover their entry into the frame.  Upon examining the assembly, I could see the red color of my upper bearing seal visible beneath the TriRig stem spacers.  This didn't look adequately protected from ingress of water and dirt to me, unlike when the OEM cone-shaped headset cover was used.  On disassembly I found: the steer tube expansion compression assembly was slightly higher than the top edge of the steer tube, the shim supplied with the bars was already in use below the TR spacers, and there appeared to be no carbon paste on either the steer tube or inside the Alpa One clamping area.  I read TriRig's installation instructions for reassembly with my headset cover, put the shim on top of that, and applied paste as specified.  Result: some improvement, most likely due to the slight resultant shortening of the brake lines given the stock cap is about 3-5 mm taller than 2 TR stem spacers. 
Left: original headset cover.  Right: TriRig stem spacers
(photographed upside down).

2. Brake impact.  Both sides of the head tube were chipped by the blunt edges of the upper portion of the brake and I was concerned about eventual structural damage.  On disassembly I found the adapter plate (to connect the single-bolt component to the two mounts in the fork) was also cutting into the fork.  I tried sliding nalgene tubing of different diameters over the spring wire that keeps the brakes open when not in use, to act as a bumper for the frame.  However the point of impact was higher than the nalgene could reach.  I replaced that with some nalgene cut lengthwise and affixed with electrical tape to the upper portion of the brake where it hit.  I also added nalgene as washers for the bolts securing the adapter (to shim it out), and another portion taped to the back of the adapter to protect where it still touched the head tube.  Upon reading the installation instructions to ensure correct torque for the bolts, I saw TriRig supplies two adapter sizes.  Sure enough, use of the shorter one a) doesn't hit the front of the head tube and b) positions the brakes so that they don't impact the frame even when the handlebars are turned through their full range of motion.  All this really ever needed was greater attention to detail during initial install.
Longer adapter plate scored the head
tube clear coat.  The chip just above
the glare line was small at this point.
Wire cap not yet installed.

While on the topic of brakes, I wanted to change out the orange pads TriRig supplied for my grey/black ones specific for carbon rims.  I found this was impossible without removing the brake shoes from the calipers because the shoes had been installed with the pad retaining screws facing up into the brake assembly.  I reinstalled them with the screw facing downward so I wouldn't have to realign the shoes to the brake track every time I changed out my training vs racing wheels.
 Moving to the rear brake which also had the difficult shoe orientation, I found the center bolt was screwed into the frame (too long) and had chipped the paint there.  TriRig supplied bolts of multiple length, so I simply selected a shorter one that didn't impact the frame.

Incidentally, while removing the rear wheel to work on the brake, I discovered the new derailleur doesn't release the cassette as easily as the prior set up and I had a devil of a time getting the wheel off.  With the bike flipped over I found the underside of the chain stay has 3-4 chain-sized chips in the paint.  There's a screw that meets the rear of the hanger and adjusts the fore / aft rotational position of the component; I wonder about adjusting that but don't have the patience right now to sort out the trickle down of new issues that might cause.

3. Di2 junction port.  After some back and forth with the forum thread, in which TriRig and some posters indicate it fits while others say the fit for the junction is exceedingly tight even when you get it in, I spent hours considering alternate wiring configurations and locations for either this or a new junction, to achieve the all-wires-hidden install advertised for this bar.  Hours.  That alone might be worth another blog post.  And after buying new etubes of varying lengths, B junctions, and a 3-port A junction, ryryrocco posted a picture of his 5-port easily fitting into the cavity.  Turns out:
  • a) The critical difference is whether or not full housing is run to the front brake.  The internal cable housing stop that permits bare wire to run to the front brake creates a hard 90 degree bend that prevents the 5-port from fitting.  TriRig's installation instructions don't cover this topic, and the FAQ page only mentions they ran full housing, not that it was necessary to achieve the fit. 
  • b) ST poster ryryrocco is local to me & had his build done at the same shop I did! leaving me a bit miffed to have spent so much time fixing a problem that should never have been an issue in the first place.  
Sure enough, once I pulled the front brake line, installed new housing to length, and then fed the used wire with frayed end through the housing (somewhat tedious, as you can imagine), I was able to close up the stem cover with the 5-port (that I had filed as much as I dared) inside and connect my front brake line.  Ultimately victorious in the battle, but not without considerable losses of time, energy, and some $$ spent on unneeded Di2 parts.
Right: Full housing allows more play for the brake line, letting the 5-port junction fit snugly, mostly in the stem cavity but allowing the cover plate to go on.  Left: Bare wire used with the cable stop does not yield enough space inside without cutting the junction down to the circuit board.
4. Continued fit tweaks. Despite all the cuts to the extensions, the shifter buttons were too high to reach with my forearms resting flat on the pads. Potential solutions included:
  • Find new extensions with a different bend angle.  No, buying and testing out multiple extensions to identify ones of the ideal angle defeats the purpose of having purchased this highly adjustable handlebar set in the first place.  The whole idea is to discontinue the 1-off purchasing of new stems every time I want to tweak my position, so this idea was a step in the wrong direction.
  • Buy new shifters.  R9160 single button shifters are shorter in overall length and arguably sleeker than my 671's.  But I purposely chose the 2-button shifters, couldn't return them at this point, didn't want to get into re-selling them, and the 9160's would also require I buy two more e-tube wires to connect them since the 671's came with permanently attached wires.
  • Left: R671.  Right: R9160.
  • Raise the pads to be higher than the extensions.  I tested the pad risers from my original bars and they did solve issue.  However TriRig couldn't endorse this modification as safe and it seemed a bit silly to raise the pads separately from the monopost that already provides for stack adjustment.
What I did: rotate the shifters around (buttons up) to use w/ my thumbs, which made the existing length of the extensions forward of the bend ok.  This required unwrapping the bar tape to alleviate tension in the etube line.  I also cut 9-15 mm off the rear of the extensions to even them up and improve the aesthetic & gap distance to the base bar.  I consulted Shimano's installation instructions - you know, for torque spec - and found it stated these shifters cannot be used with carbon bars or extensions unless they are lined with aluminum inserts.  Good grief, no one mentioned this before.  (Shrug).

5. Top tube wire cap.  Installation of the cone headset cover made the cable holes in the top tube seem more unsightly.  Not to mention the paint here was less than perfect (visible drip in the clear coat).  I knew from my trip to Lowes that I needed a threaded insert to fit a 0.7 M4 bolt but didn't know how to spec the outer diameter.  I asked the painter since he'd handled the last one; his reply was to buy a whole new wire cap.  After purchasing a Metric Thread Insert for Wood, Solid Brass #400-M4, M4 x .375 for $0.74 plus $9 shipping, which was much too wide, I conceded that buying a new cap from the only supplier to have one would ultimately be simpler (shipped from the UK, $45 when converted to USD).

Installation was a bear.  Aside from requiring removal of the bars & fork in order to access the underside of the top tube from within the head tube, and pulling the rear brake line from inside the frame, I needed something like an allen wrench on a spring in order to allow rotation through the crooked trajectory.  It's also a tight space, with no way to get my fingers in there to guide the bolt to the insert.  Luckily the bolt head was the right size to be held by the nalgene tubing I had (which I inserted up from the bottom of the head tube), and I was able to guide the bolt tip to the insert using a twist tie I had shaped into a hook (inserted from the top of the head tube).  A few rotations of the nalgene seated the bolt sufficiently that I could pull the hook out.  Then it was a matter of snugly aligning the wire cap's insert with the frame's insert so the bolt would hold the two together without a gap.  Once again: victorious, but not without casualties (I actually broke an allen wrench and may have kicked a few things in frustration).  So for all the effort, did installing the cap help restrict the brake line and reduce floppiness?  Eh, some.  

6. Touch up paint.  While I was in contact with Jack, I mentioned all the chips and asked if I could get some paint for touch ups.  Answer: no, but I could try contacting an autobody shop.  No thanks.  I've put electrical tape on the brake blemishes to prevent further chipping and hope to learn whether its ok to put nail polish on carbon.

7. One last check for lube and paste.  Given all my post build observations, I just wanted to check whether the seat post had been pasted (didn't seem so) and add grease to my dry seat clamp bolts (pedal threads also looked dry).  So much for luck.  On reassembly, the seat post compression wedge was stripped before reaching its torque spec, rendering my bike an expensive paperweight one week before my next race.  (Deep sigh).  Thankfully I was able to overnight a new part from a US supplier (actually bought 2), and I've learned I need to get a new torque wrench before I break anything else.
Slice 2.5, My retrofit.  OEM headset cover & trailing wire cap, full housing to front brake, 
Di2 junction inside stem.


Ready for Eagleman.
Recap

The timeline from disassembly to back in my hands and ready to ride was 11 weeks, and I spent 4 more re-configuring elements of the shop build.  Below is the entire list of mods I've made to this bike.  I really which this had been less of a journey, though have come to expect that anytime one thing is changed, something else becomes an issue. 
  • Order (buy) bike without ability to test ride first.
  • Have seat post and extensions cut from their giant stock dimensions to that suitable for my size.  
  • Install the better saddle from my prior bike (Specialized Power Saddle) and new pedals (Shimano vs Egg Beaters).
  • Buy 2nd hand 700 cc race wheels listed on ST Classifieds from a guy who took weeks to bother to ship them out.  
  • Have cable adjuster installed in order to facilitate rear brake adjustment when switching between the stock training wheels and race wheels.  (I found it truly odd the bike did not ship with a mechanism for doing this easily).
  • Learn that I can't move my prior crank (Shimano) with power meter (Stages) to this bike without: a) getting an adapter to convert the Slice's press fit bottom bracket and b) changing the rear / bottom mount brake to a center-pull one that would not hit the Stages PM device.  
  • Decide that the stock crankset (Hollowgram SiSL, 165 mm length, mid-compact chainrings) is a better choice than my prior crankset anyway (172.5 mm, compact) and buy a new PM (Quark).
  • ~2 yrs later, test many new saddles and settle on the Power Arc.
  • Get ReTul bike fit which resulted in: changed cleat position and shimming (fewer shims for my shorter leg, angled shims on both sides to improve biomechanics = less knee-in pedaling and thigh rub); longer stem (the original 80 mm switched to 100 mm); bars were moved to lowest position.
  • ~18 mo later, ordered new drivetrain (Di2), new handle bars (TriRig), new brakes (TriRig), and contemplated changing frames.
  • Move to the 2018 Sitero Expert Gel saddle after ~9 mo on the Arc.
  • Frame stripped of parts, painted, and rebuilt as a new bike.
  • Reconfigured multiple elements of the build as highlighted in this post.
  • Pending: Resolve BTA hydration & garmin mount issues, discontinue disassembly / reassembly every weekend, find a way to touch up all the chipped paint, enjoy riding new bike build.
  • Future: Find a home for the pile of un-needed bike parts I have!

Sunday, May 12, 2019

Bike Upgrade: Modify or Buy New?

2018 ReTul adjustment: 100 mm stem 
replaced the stock one, bars moved as 
 low as they go, Power Arc saddle.
Despite the ReTul guided refit, my Slice needed further modifications to improve comfort.  This is what I wanted:
  • Improve the angle of my wrists on the extensions.
  • Raise my forearms to bring my shoulder to wrist angle closer to 90 (my ReTul report says it's 83-88, but it looks >90 to me).
I also wanted Di2.  Not because it sounds sexy or to avoid being accused of "shifting with wires, like a Caveman" as one of my friends put it.  Electronic drivetrains make it possible to shift gears from multiple hand positions and specifically: I find the ability to shift gears from the brake levers to be an enhanced safety feature, similar to STI for road bikes.  This will be helpful on courses that involve prolonged standing climbs but importantly, also while navigating potholes and the stops & starts that are present in every ride.  

At the point my bike would require stripping of virtually all parts to make these changes, I had to consider the merits of rebuilding the Slice versus considering some other bike frame that might be more worthy of all these modifications.  Not to mention that I never liked the Slice's color scheme.   


Ventum.  The blue part of the top tube is 
actually a water reservoir.
Sitero older (left) and newer (right) models.
Coincidentally, my friends at Ironman Hawaii were test riding and buying 2018's featured bike: the Ventum.  Its features include:
  • Ease of wrenching, such as break down and rebuild for travel.
  • A built in hydration system that looks sleek, improves the aerodynamics of the bike, and is easier to use than an in-frame bladder systems (Specialized Shiv with Fuelselage) or newer behind the seat version (S-works 2019 Shiv disk model).
  • Available as a frameset, so I wouldn't get stuck with another set of handlebars / extensions that might limit my comfort.  
I had the opportunity to ride my friends' bike for a test consisting of multiple laps around a 1 mile oval followed by a short standing climb.  Her Ventum Z (size small) was outfitted with Zipp wheels, TriRig Alpha X handle bars, a new Sitero saddle, and was an absolute blast to ride.  It's a slightly heavier bike, which means that it carries its momentum well, and it felt super smooth and stable in the descending sweeping turn of this course.  The bike felt a little odd in the standing climb though, potentially due to the missing weight in the front end that must usually come from the downtube.  If I were an athlete who preferred flat bike courses I may really have given the Ventum some further thought.  But as it was my conclusions came down to:
  1. I posted faster speeds for the loop on my Slice with training wheels than on the Ventum with Zipps.
  2. The Slice is lighter and climbs well.
  3. Keeping the Slice meant avoiding having to research and select a new crank & PM option, since I couldn't easily sell the Slice without including all of its components.
  4. Painting the Slice (to fix that I found it ugly) would cost less than buying a new frame, crank, and maybe new power meter.  
Though I'll confess: I went straight home from that test ride and immediately bought the identical saddle; while the earlier Sitero model seemed horrible to me, this new one - and really Ashley's entire bike fit - felt fantastic.

Coming next, Adventures in Bike Modification

Bike Fits Often Help, But They Aren't Cure-alls

Bike shopping while short is a challenge
If you're a shorter cyclist (<5'5"), you're probably familiar with the frustration of trying to find a bike that fits you comfortably because the reality is that pretty-much no bike shops carry bikes / frames / parts (stocked in the store) for small riders.  If you're lucky, you are able to take advantage of the ability to be fit for a bike before buying one and hopefully are also then provided with a list of frames that will work for your fit dimensions.  If you're less lucky, the fitter will pretty much just recommend the brands they carry, and if you're less lucky still - will just mention the brands they carry even if those are not the frames that would actually fit you best.

It can be pretty daunting to buy an expensive item like a bike, without a great deal of experience on how your body should feel on it, and pretty disappointing if after getting the bike and a few rides in on it, you just aren't comfortable.  Many shops have a display of saddles which probably gives you a good idea that if yours isn't comfortable, something can be done; ie buy a new one.  Swapping out saddles is conceptually simple but can turn into a seemingly endless cycle of frustration if after trying many, something still seems "wrong".  My saddle sagas have been previously enumerated herehere, and here.

Suggestions then often move to changing out the stem as a way to bring handle bars closer, in an effort to make a frame that might have been too big in the first place work better for the rider.  This can be less expensive than buying a saddle but it starts to feel annoying that various parts of the bike you already paid for need to be changed out at added expense to get it to work for you.  And I haven't even touched on crank length yet.

The low riding position on time trial bikes can lead to uncomfortable hip angles and a feeling of being stuck at the top of the pedal stroke or somehow un-fluid while pedaling.  Did you know this can be addressed by getting a new crank with shorter crank arms?  Yep, another modification at additional expense, which is an even greater disappointment if you had already been set up with a crank-based power meter as it's possibly not going to be directly transferable.  (Crank modifications are a bit of a pain as there are various parts that might be incompatible like the chain rings, or require an adapter to make work, such as the bottom bracket).

And it's not just a matter of matching rider height with frame size.  There's also differences in how people are proportioned from the hips up versus hips down.  This is why not all riders of height X are equally happy on frame size Y.


Long crank (172.5) 
on a tiny bike (48 cm).
Shorter cyclist on a small frame
I'm about 5"3" and I used to ride a size 48 Cervelo P2C on 650 wheels (a lucky find at a bike swap).  I had a couple of fit adjustments over my 5 years with it, but ultimately something always seemed off, like I needed to bring my elbows in closer.  I don't know if a shorter stem was available or would have helped, but I didn't ask because I didn't want to use 650 wheels any more.

My coach thought the new (2015) Cannondale Slice (also 48 cm) would work well for me.  I took his word for it without doing a pre-purchase bike fit or exploring other options.  But I liked what I read about it, that it was a comfortable bike (versus being super stiff) and easy to travel with (versus some super bikes that were considered more difficult to work on).  It also uses standard cockpit components that could be adjusted readily (versus some super bikes with custom / integrated / non-adjustable stems).


First few pedal strokes
on any Cannondale TT
or road bike have felt
like this to me.

Same cyclist on small frame with 700cc wheels

I was pretty disappointed to not like my first several rides on the Slice.  It felt very squirrely and like it was on stilts or something (all Cannondales I've ridden have felt "high up" like this).  It's just something to get used to, after which this bike felt quite stable over bumps and in descents.
2016 bike fit.  Power saddle, 80 mm stem, 
uncomfortable wrist angle (!!).


Pro's:

  • The Slice is far more comfortable over rough pavement than the stiffer Cervelo was. 
  • My elbows felt better located under my shoulders. 

Con:
  • The extensions are terribly uncomfortable b/c they are too straight and force my wrists to be bent down to hold them. 
  • The front of my shoulders would get tired.  I built up tolerance to it, but it didn't feel ideal. 

ReTul bike fit (A more elaborate fitting regimen, using motion capture of sensors placed on anatomical pivot points, versus my prior "eyeball and ruler" fits.) 

After 3 years I needed a new saddle and replaced my Specialized Power with the new Power Arc.  My LBS was offering a deal on ReTul bike fits and I thought this process would involve me getting on the ReTul bike and coming away with what my ideal bike setup should be, so that I could maybe find more comfort in the cockpit.  However the fitter said he found little value in doing that unless the person was shopping for a new bike, as it often turned out the customers' current bike would need several modifications to achieve that fit, which the customer didn't want to go for.
2018 bike fit.  Power Arc, 100 mm stem, bars 6
mm lower.  Wrist angle still uncomfortable.

Fit adjustments made:
  • The cleat shimming for my shorter leg was changed and wedge shims were added to raise the inside edge of both feet.
  • My 80 mm stem was changed to 100 mm.
  • Handlebars were lowered.
Opportunity lost:
  • This was mostly just a minor optimization session for my current setup.  Too bad, since I wondered what shorter cranks or different wrist angles would feel like (mods I may have considered, but definitely not without getting to test the crank setup first). 
This was better for a couple months but then I was back to inching around my saddle and changing my elbow position on the pads, trying to find the right combination to address what still felt "off".  I concluded my wrists needed to come up.  Rolling up a towel, laying it across my extensions, and resting my wrists on that immediately alleviated some of the forward pressure on my saddle and also eased tension in my shoulders and neck.  Not to mention how much more comfortable my wrists would be if my extensions came up to this new relaxed wrist angle.

By this point I'd found the TriRig Alpha 1 thread on SlowTwitch.  This TT handlebar / arm pad set allows for a large range of facile adjustability (arm pad height, width, & forearm angle) so it would be easy to tweak position over time as riders grew stronger, more flexible, or just needed more time to dial in their fits.  At this point I was ready to try modifying my fit on my own, and ordered a set.

To be continued...

Tuesday, May 7, 2019

Not Tiny Pics

A place to host photos for sharing.

Tri Rig spacers.  Bare wire to front brake.

Stock headset cover.  Cable housing runs to front brake.

Stock headset cover.  Cable housing runs to front brake.


Saturday, April 27, 2019

Indroducing the New Blog Name

The initial name & address for this blog, Swim Bike Slapshot, was the best I could come up with at the time for a description of who I was - a random adult who played hockey and did triathlons.  But I hadn't posted much (at all?) on hockey and honestly never had a slapshot (well maybe some good one-timers but certainly not a reliable slapshot), and I haven't even played now in a couple of years.


The name on my title page was changed to Swim Bike Stop around the time my labrum tear worsened, but I'm happy to report that this name is also not quite accurate.  No, my running has not yet returned to where it was, but it may at some point.  Plus that page title was a bit sad.  It fit at the time I changed it, but now I'd like something more upbeat.


In verbal communication, I've got a pretty deadpan and matter-of-fact delivery that can sometimes be off-putting or can other times be quite funny.  #ShitSueSays is a mock hashtag devised by my hockey & tri friends around those latter utterances. I thought I might soften the new blog title to Stuff Sue Says, alas that name is taken.  Wonder if I should give that a read...

At any rate, I hope you don't find Shit Sue Says to be offensive, but if you do - #sorrynotsorry.
;-)


PS, Rats.  It turns out there are Facebook and Twitter accounts using the name Shit Sue Says.  Oh well, no relation.